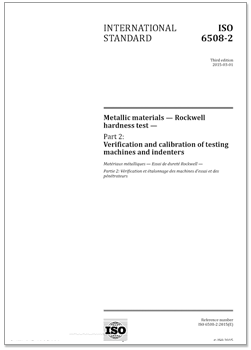
International Standard ISO 6508-2:2015(E)
Metallic materials — Rockwell hardness test —
Part 2:
Verification and calibration of testing machines and indenters
ISO 6508 consists of the following parts under the general title Metallic materials —— Rockwell hardness test:
ISO 6508-1Metallic materials —— Rockwell hardness test Part 1: Test method
ISO 6508-2 Metallic materials —— Rockwell hardness test Part 2: Verification and calibration of testing machines and indenters
ISO 6508-3 Metallic materials —— Rockwell hardness test Part 3: Calibration of refernce blocks
Content
Foreword
1 Scope
2 Normative references
3 General conditions
4 Direct verification of the testing machine
4.1 General
4.2 Calibration and verification of the test force.
4.3 Calibration and verification of the depth-measuring system
4.4 Calibration and verification of the testing cycle
4.5 Calibration and verification of the machine hysteresis
5 Indirect verification of the testing machine
5.1 General
5.2 Procedure
5.3 Repeatability
5.4 Bias
5.5 Uncertainty of measurement
6 Calibration and verification of Rockwell hardness indenters
6.1 General
6.2 Diamond indenter
6.2.1 General
6.2.2 Direct calibration and verification of the diamond indenter
6.2.3 Indirect verification of diamond indenters
6.3 Ball indenter
6.3.1 Direct calibration and verification of the ball indenter
6.3.2 Indirect verification of the ball holder assembly
6.4 Marking
7 Intervals between direct and indirect calibrations and verifications
8 Verification report
Annex A (normative) Repeatability of testing machines
Annex B (informative) Uncertainty of measurement of the calibration results of the
hardness testing machine
Bibliography
1 Scope
This part of ISO 6508 specifies two separate methods of verification of testing machines (direct and
indirect) for determining Rockwell hardness in accordance with ISO 6508-1:2015, together with a
method for verifying Rockwell hardness indenters.
The direct verification method is used to determine whether the main parameters associated with
the machine function, such as applied force, depth measurement, and testing cycle timing, fall within
specified tolerances. The indirect verification method uses a number of calibrated reference hardness
blocks to determine how well the machine can measure a material of known hardness.
The indirect method may be used on its own for periodic routine checking of the machine in service.
If a testing machine is also to be used for other methods of hardness testing, it shall be verified
independently for each method.
This part of ISO 6508 is applicable to stationary and portable hardness testing machines.
Attention is drawn to the fact that the use of tungsten carbide composite for ball indenters is considered
to be the standard type of Rockwell indenter ball. Steel indenter balls may continue to be used only
when complying with ISO 6508-1:2015, Annex A.
2 Normative references
The following documents, in whole or in part, are normatively referenced in this document and are
indispensable for its application. For dated references, only the edition cited applies. For undated
references, the latest edition of the referenced document (including any amendments) applies.
ISO 376, Metallic materials — Calibration of force-
proving instruments used for the verification of uniaxial testing machines
ISO 6507-1, Metallic materials — Vickers hardness test — Part 1: Test method
ISO 6508-1:2015, Metallic materials — Rockwell hardness test — Part 1: Test method
ISO 6508-3:2015, Metallic materials — Rockwell hardness test — Part 3: Calibration of
reference blocks
相关标准
国家标准GB/T 230.2-2012《金属材料 洛氏硬度试验 第2部分:硬度计的检验与校准》
本标准使用重新起草法修改采用国际标准ISO6508-2:2005《金属材料 洛氏硬度试验 第2部分:硬度计(A、B、C、D、E、F、G、H、K、N、T标尺)的检验与校准》(第二版),在文本结构和技术内容方面与ISO6508-2:2005一致。
本标准与ISO6508-2:2005的技术性差异及其原因如下:
—— 删除了ISO6508-2:2005的前言,重新编写了前言;
—— 关于规范性引用文件,本标准做了具有技术性差异的调整,以适应我国的技术条件,调整的内容集中反映在第2章“规范性引用文件”中,具体调整如下:
● 用修改采用国际标准的GB/T230.1代替ISO6508-1(见第1章、4.3.1.2、4.5、5.2.2和B.1.1);
● 用修改采用国际标准的GB/T230.3—2012代替ISO6508-3:2005(见4.3.1.2和5.1);
● 用修改采用国际标准的GB/T4340.1代替ISO6507-1(见4.3.2.3.2和4.3.2.3.3);
● 用等同采用国际标准的GB/T13634代替ISO376(见4.2.3)。
—— 修改了表1的内容,并规范了表中所列“标尺”和“洛氏硬度单位”的表示方式;修改了表5中、图A.1和图A.2的曲线上“示值相对重复性指标”的表示方式;
—— 增加了公式(3)、符号“rrel”和“c”以及有关这些符号的说明;原公式(3)的序号改为公式(4);
—— 改正了附录B中及表B.1、表B.5、表B.6、表B.8和表B.9中一些错误的符号、计算结果和数据,并在做过改正的地方用下划线注明;
—— 规范了附录B中向公式里代入数值的一些计算式的表达方法;
—— 将附录B的公式(B.10)、公式(B.12)和表B.9中的符号“b”用符号“E”替换;
—— 删除了参考文献。
本标准与ISO6508-2:2005相比存在技术性差异,这些差异涉及的条款已通过在其外侧页边空白位置的垂直单线(│)进行了标示。
本标准还做了下列编辑性修改:
—— 将“ISO6508的本标准”一词改为“本标准”;
—— 用中文的小数点符号“.”代替英文的小数点符号“,”。
在线阅读 免费下载


